OAuth for Connector Developers
IMPORTANT: OAuth for plugins is available in Tableau 2021.1 and newer. Multi-IDP config for plugins is available starting in Tableau 2023.1.
This document explains how to add OAuth to a connector. It’s meant for developers. For an explanation of OAuth configuration and usage see OAuth Config.
In this section
How to Enable OAuth for a Plugin Connector
First check your database and driver documentation to make sure it supports OAuth.
To enable OAuth for your connector add an <oauth-config> field in the manifest.xml and link to an oauthConfig.xml you created, described below.
For a complete example please refer to https://github.com/tableau/connector-plugin-sdk/tree/master/samples/scenarios/snowflake_oauth.
  manifest.xml

  <?xml version='1.0' encoding='utf-8' ?>
  <connector-plugin class=...>
    ...
    <dialect file='dialect.tdd'/>
    <oauth-config file='oauthConfigPing.xml'/>    <!-- add this to to define your OAuth Configs -->
  </connector-plugin>
Starting in Tableau 2023.1, you can add multiple embedded OAuth configs. The end users may also provide their own custom OAuth config.
  manifest.xml

  <?xml version='1.0' encoding='utf-8' ?>

  <connector-plugin class=...>
    ...
    <dialect file='dialect.tdd'/>
    <oauth-config file='oauthConfigPing.xml'/>
    <oauth-config file='oauthConfigOkta.xml'/>
  </connector-plugin>
Starting in Tableau 2023.3, you can create a connector that does not have a default embedded OAuth config. To do this, add a oauth-config element with file=null_config. The customer will be required to provide their own custom OAuth config before making an OAuth connection.
  manifest.xml

  <?xml version='1.0' encoding='utf-8' ?>
  <connector-plugin class=...>
    ...
    <dialect file='dialect.tdd'/>
    <oauth-config file='null_config'/>
  </connector-plugin>
In your connectionFields.xml file make sure to add an authentication field with a value equal to oauth. For example:
OAuth Only
<field name="authentication" label="Authentication" category="authentication" value-type="string" editable="false" default-value="oauth" />
Multiple Authentication Options
    <field name="authentication" label="Authentication" category="authentication" value-type="selection" default-value="auth-user-pass" >
        <selection-group>
            <option value="auth-user-pass" label="Username and Password"/>
            <option value="oauth" label="OAuth"/>
        </selection-group>
    </field>
In your connectionProperties.js file you need to use your connector specific logic to handle how to pass in OAuth attributes. Example:
  if (authAttrValue == "oauth")
  {
      params["AUTHENTICATOR"] = "OAUTH";
      params["TOKEN"] = attr["ACCESSTOKEN"];
  }
In your connectionResolver.tdr file, the following related OAuth attributes will be automatically included so you do not need to define them:
- ACCESSTOKEN
- REFRESHTOKEN
- CLIENTID
- CLIENTSECRET
- access-token-issue-time
- access-token-expires-in
- oauth-client
- id-token (optional)
- instanceurl (optional)
You still need to define other required attributes for your connector; authentication and username are currently required for OAuth connections so make sure to add them as well.
<required-attributes>
    <attribute-list>
        <attr>server</attr>
        <attr>dbname</attr>
        <attr>sslmode</attr>
        <attr>authentication</attr>
        <attr>username</attr>
    </attribute-list>
</required-attributes>
Multiple Embedded OAuth Configs
Available starting in Tableau 2023.1
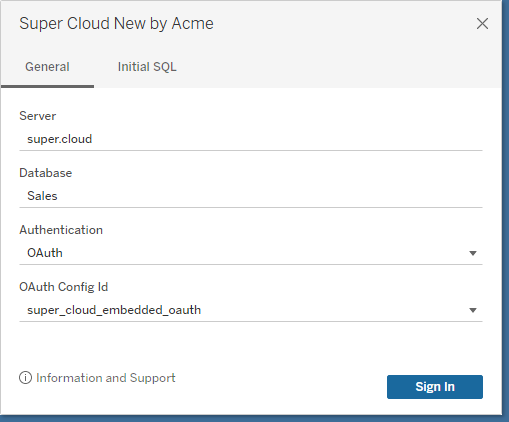
The plugin developer may add multiple embedded OAuth configs to the plugin starting in Tableau 2023.1. Each should have a new element <oauthConfigId>. This should be unique and is displayed in the UI. The user will be prompted to select from the available configurations when creating a connection.
Instance URL/Custom Domain
Some IDPs have a single global endpoint, such as https://accounts.google.com/o/oauth2/. Others have different instances, for example Okta would have a different instance URL for each customer. If your authorization server or IDP has different instances, then either:
- Enable OAUTH_CAP_SUPPORTS_CUSTOM_DOMAIN. This only works with embedded OAuth configs. The instance URL will be collected later from the end-user or the admin.
- Create seperate custom OAuth configs for each instance. Custom OAuth config shouldn’t set OAUTH_CAP_SUPPORTS_CUSTOM_DOMAIN, and should specify authUri, tokenUri, userInfoUri fields as absolute paths, which contains the instance URL.
If OAUTH_CAP_SUPPORTS_CUSTOM_DOMAIN is enabled, then the URIs/URLs should use relative paths. For example:
<authUri>/oauth/authorize</authUri>
<tokenUri>/oauth/token-request</tokenUri>