Popular Client Integrations
This guide walks you through everything you need to use Tableau MCP with popular third-party agents. These products are evolving quickly and names sometimes change (connectors, plugins, etc), but the notes and instructions here should help you get up and running.
Slack
You can connect Slackbot to Tableau MCP by installing the latest version of the Tableau Slack app into your workspace.
First-time Tableau Slack App installation
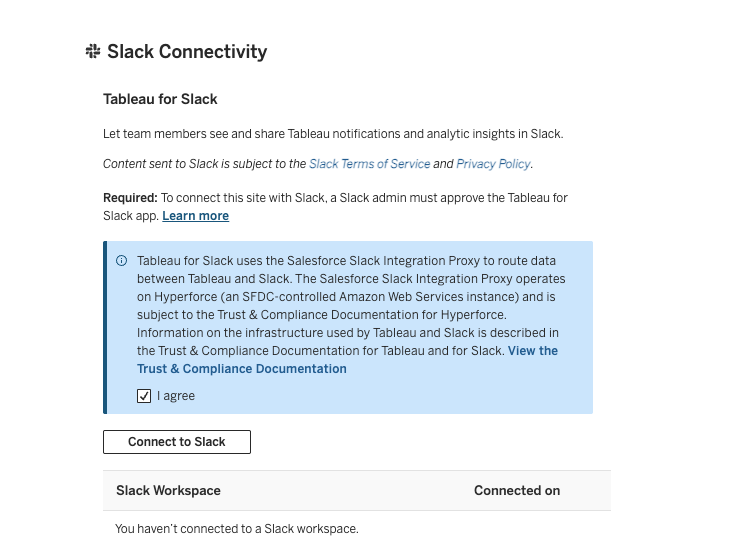
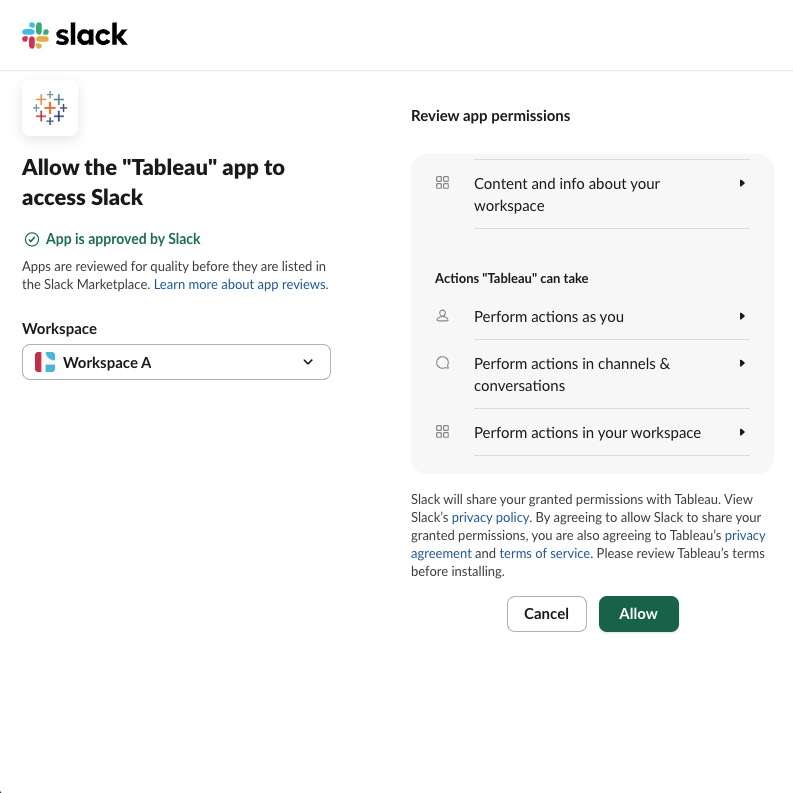
If it's your first time installing the Tableau Slack app, go to Tableau site settings for the Tableau site you want to connect Slack to. From site settings, click the Integrations tab and scroll to the bottom of the page until you see the Slack Connectivity section. Click the Connect to Slack button. Then, from the app install dialog, click Allow to connect to your target Slack workspace.
To confirm that the app installation completed, go to your Slack workspace, click Tools > Apps, and look for Tableau in the list of installed apps.
Multi-site users can still use Slackbot to interact with multiple Tableau sites. Tableau MCP uses a separate OAuth flow from inside Slackbot to connect users to their target site.
Also, you cannot install the Tableau Slack app from the Slack marketplace. You have to do it from the Tableau site settings.
Using Tableau MCP from Slackbot
Once you've installed the Tableau Slack app, users of the workspace simply have to click the Apps button inside Slackbot and connect to their target Tableau site through the built-in OAuth flow.
For more information about Slackbot and MCP server support, see Connecting an MCP server to the Slackbot MCP Client.

Claude Product Suite
Tableau Connector for Claude and Cowork
Tableau MCP is now available as a connector in the Anthropic Claude directory. To install the connector, follow these steps.
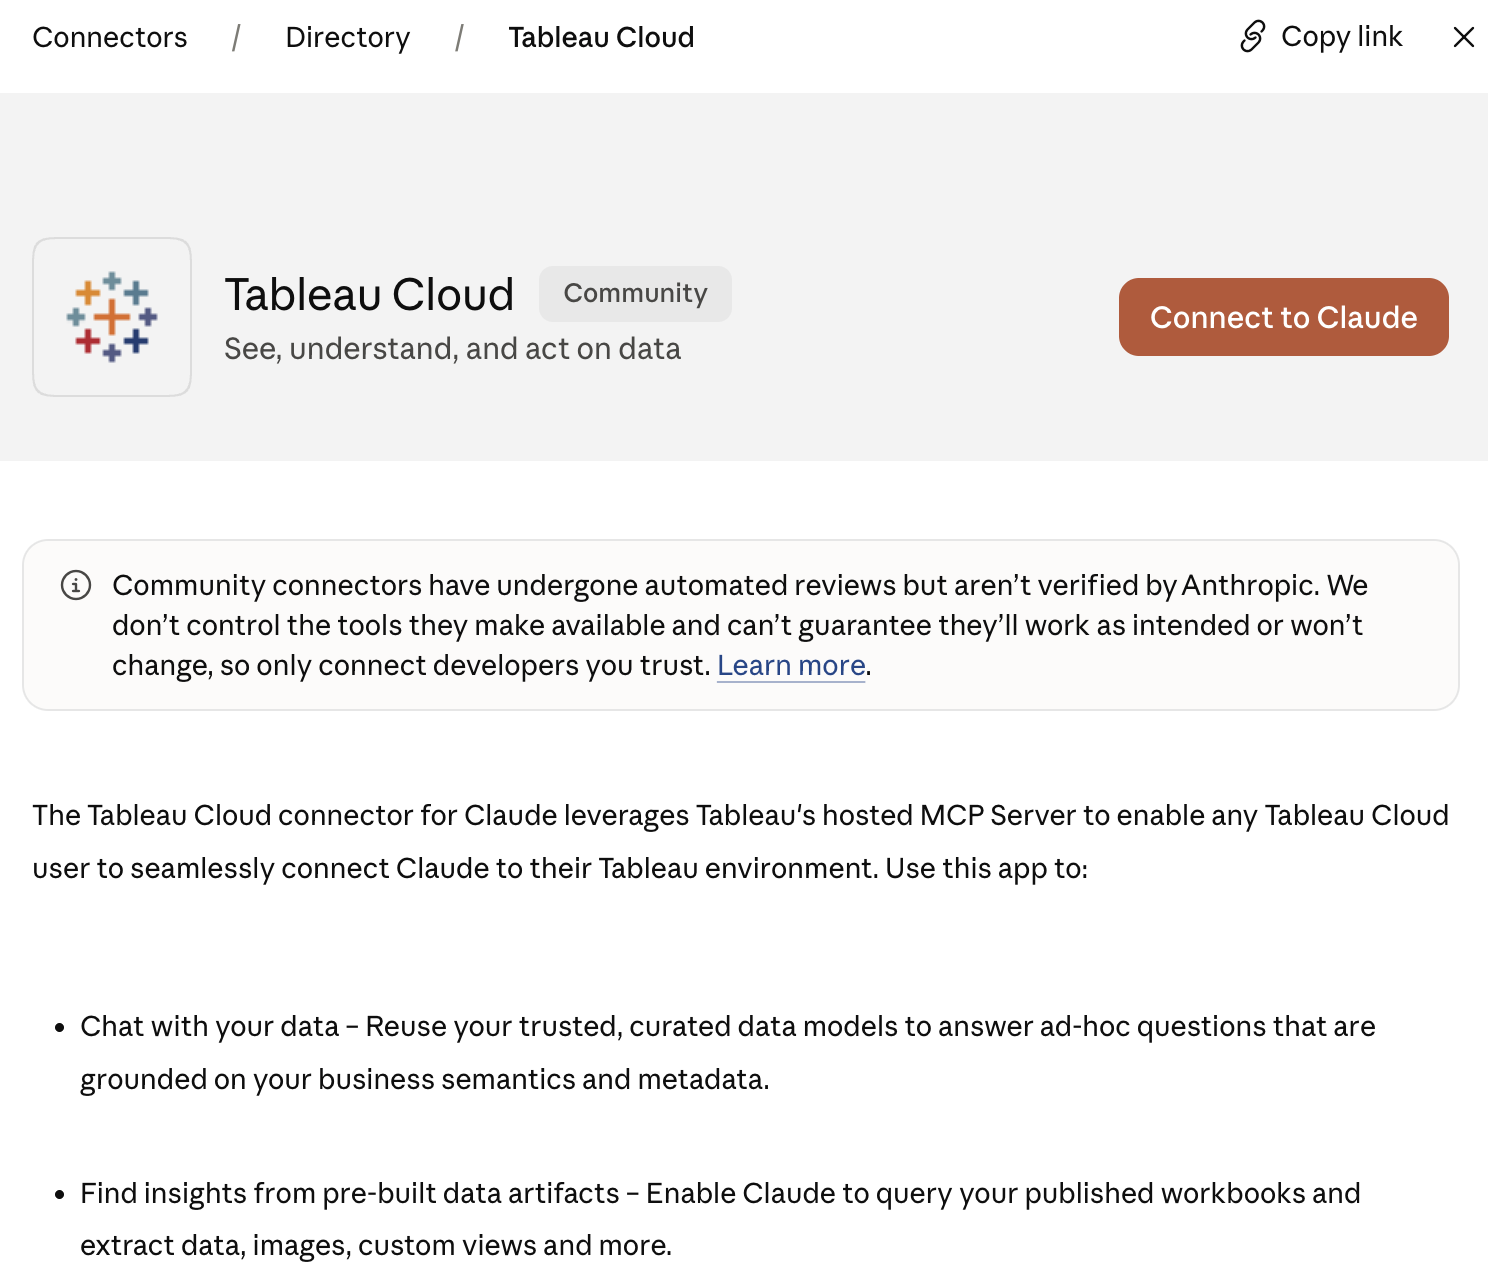
In Claude, go to Customize and click on Connectors. Click Add -> Browse connectors, then search for Tableau. Select the Tableau Cloud connector, then click Connect to Claude to start the OAuth flow and authorize access to your Tableau data.
After authorization completes, you’ll be returned to Claude. Start a new chat to experiment with some known data sources like Superstore.
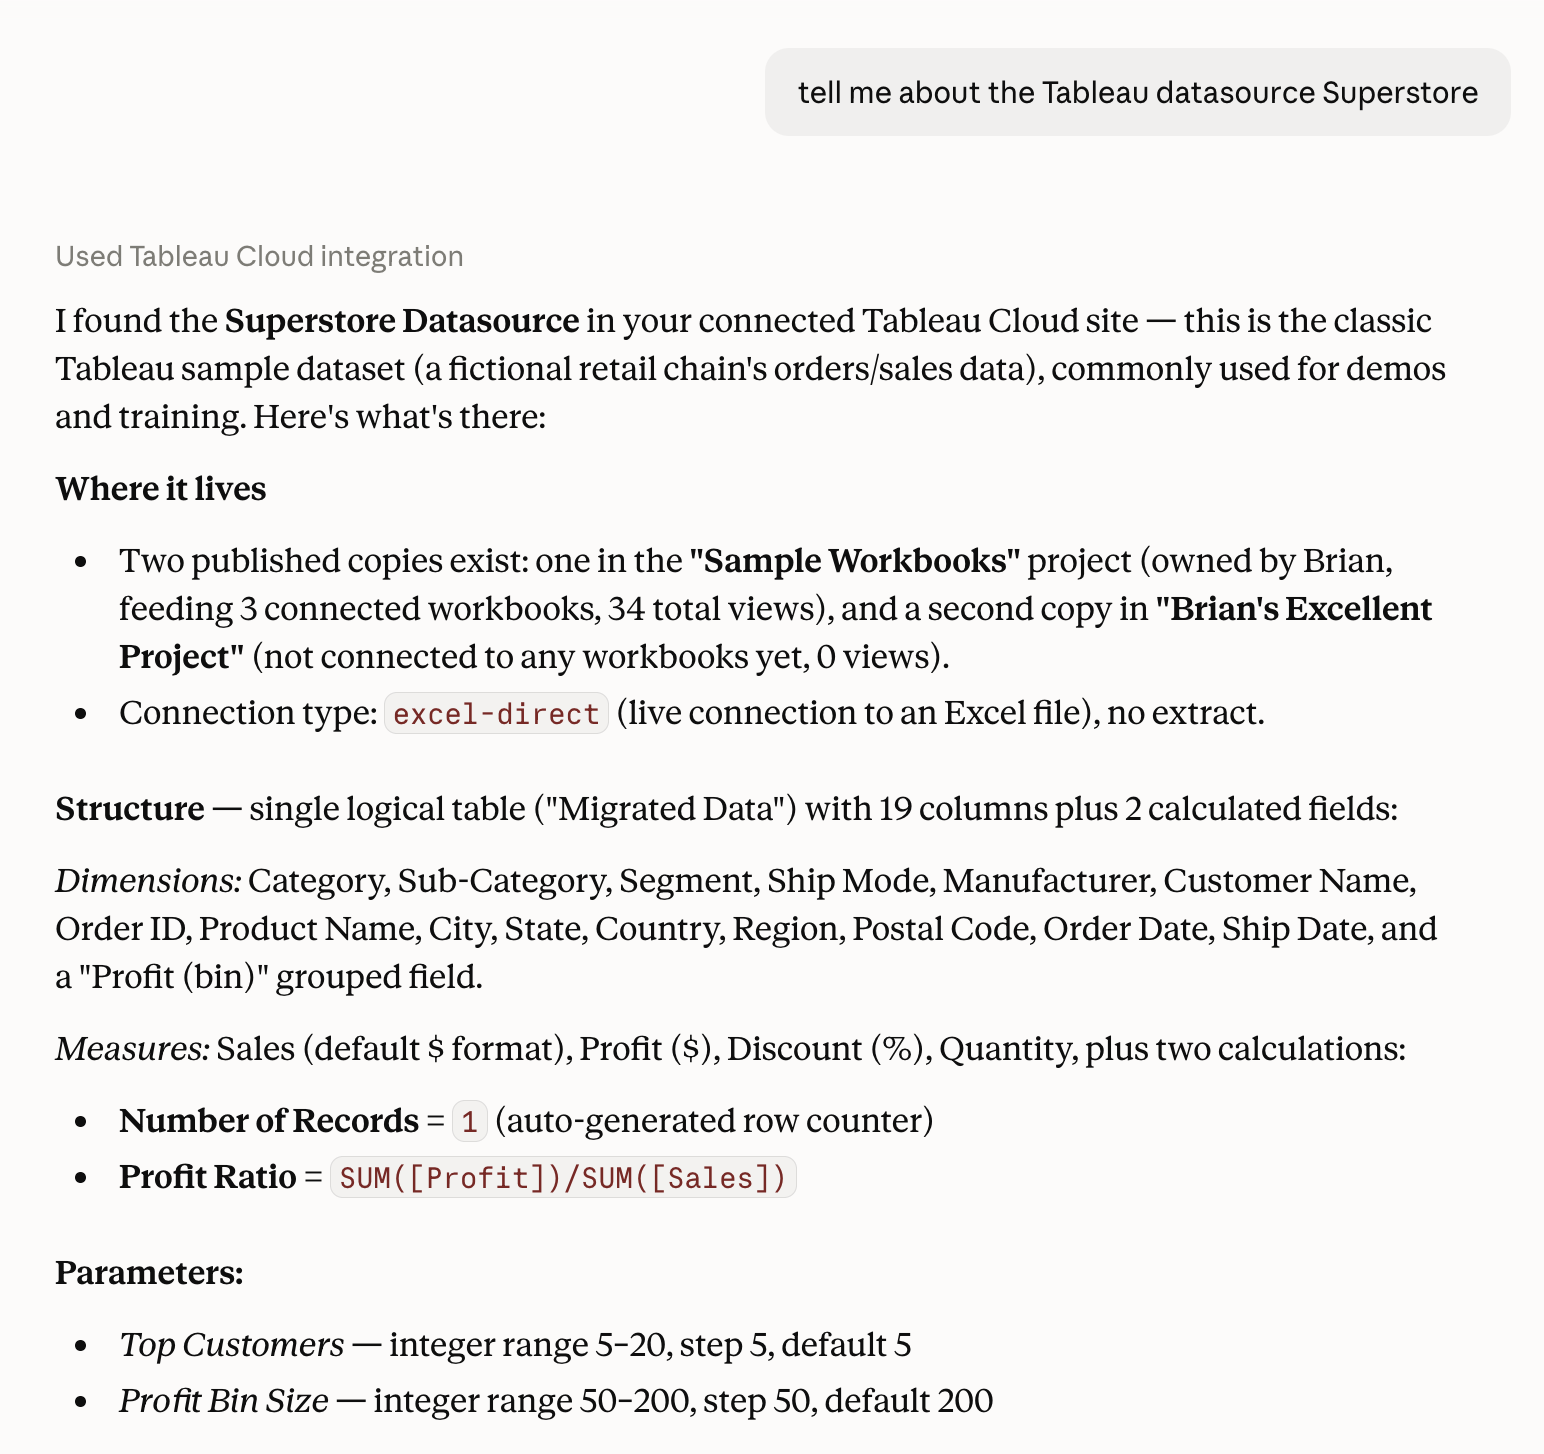
Claude Desktop Extension
The Tableau Extension for Claude Desktop does not use the hosted service. Instead, it runs locally and connects to Tableau Server or Cloud. Claude Desktop extensions are a bundle that contains all the Tableau MCP code and dependencies in a single .mcpb package, and it uses Claude Desktop's native Node.js runtime. To use the Tableau extension, you must have installed Claude Desktop.
Step 1: Create a Personal Access Token (PAT)
Log in to your site, then click your profile in the upper right to bring up My Account Settings.
Scroll down to Personal Access Tokens and create a new one. You can use any token name, but a memorable one like "mcp" is recommended to make later configuration easier. Make sure to copy and save the value because it's only shown this one time. By default, Tableau PATs expire after 15 days of inactivity (see warning below), so you may need to periodically create a new one.

Keep your PAT safe and don't share with anyone. Pay attention to the expiration date; default expiration is 15 days.
Make note of these 4 values which you'll need later for the MCP configuration:
- SERVER (e.g.
https://10ax.online.tableau.comorhttps://tableau.example.com) - SITE_NAME (e.g. sales-official; on Server leave blank to use the default site)
- PAT_NAME (e.g. mcp)
- PAT_VALUE (value copied after PAT creation)
Step 2: Install Tableau MCP Extension
Option 1: Install from Claude Marketplace
- Open Claude Desktop
- Go to Settings | Extensions
- Click on Browse Extensions
- Search for Tableau and install it
Option 2: Install latest from Tableau MCP GitHub
- Go to the Releases page
- For the newest release, under Assets, find and download the .mcpb file (it will be named something like "tableau-mcp-v1.15.0.mcpb")
- Open Claude Desktop
- Go to Settings | Extensions
- Drag and drop the .mcpb file onto Claude Desktop
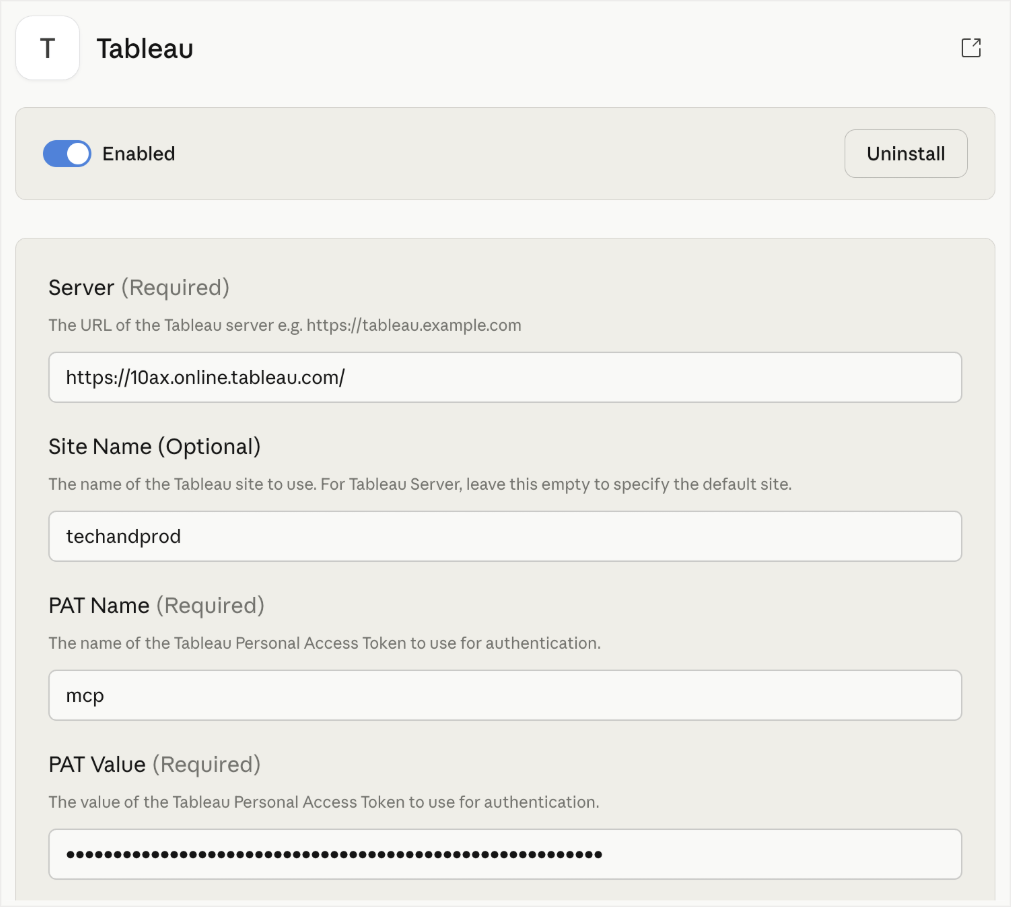
Once the extension is installed, you'll be prompted to configure Tableau MCP:
- SERVER
- Cloud: pod hostname like
https://10ax.online.tableau.com - Server: hostname like
https://tableau.example.com
- Cloud: pod hostname like
- SITE_NAME
- Cloud: required, for example sales-official
- Server: site name, or can leave blank to use the default site
- PAT_NAME (e.g. mcp)
- The name of the PAT you created in the Tableau site settings
- PAT_VALUE (value copied after PAT creation above)
When everything is configured it should look like this:
Claude Code
Add Tableau MCP to Claude Code with this command:
claude mcp add --transport http Tableau https://mcp.tableau.com
Then start a Claude Code session, type /mcp, select Tableau, and choose Authenticate to approve the Tableau sign-in.
You can verify the connection at any time with claude mcp list or within Claude Code with /mcp.
OpenAI Product Suite
Tableau MCP is now available as a plugin in the ChatGPT directory. To install the plugin, follow these steps.
In ChatGPT, navigate to Plugins and search for Tableau. Click on the Tableau plugin, then click Install plugin to start the OAuth flow and authorize access to your Tableau data.
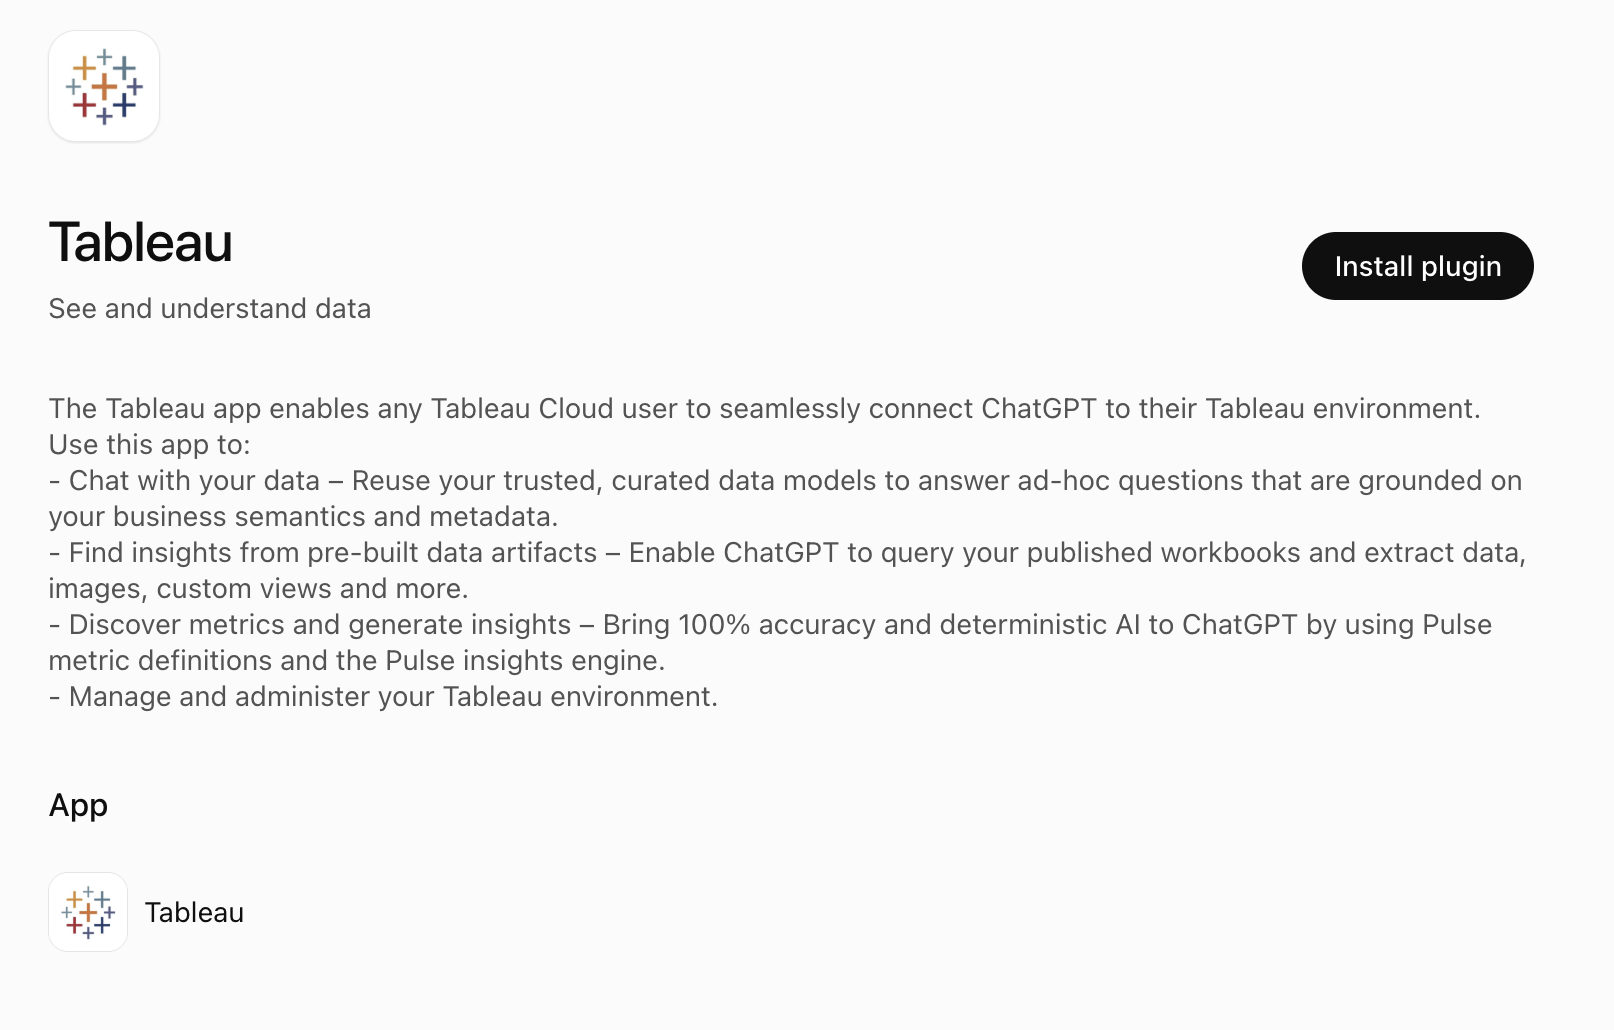
After authorization completes, you’ll be returned to ChatGPT. Click Try in chat to experiment with some known data sources like Superstore.
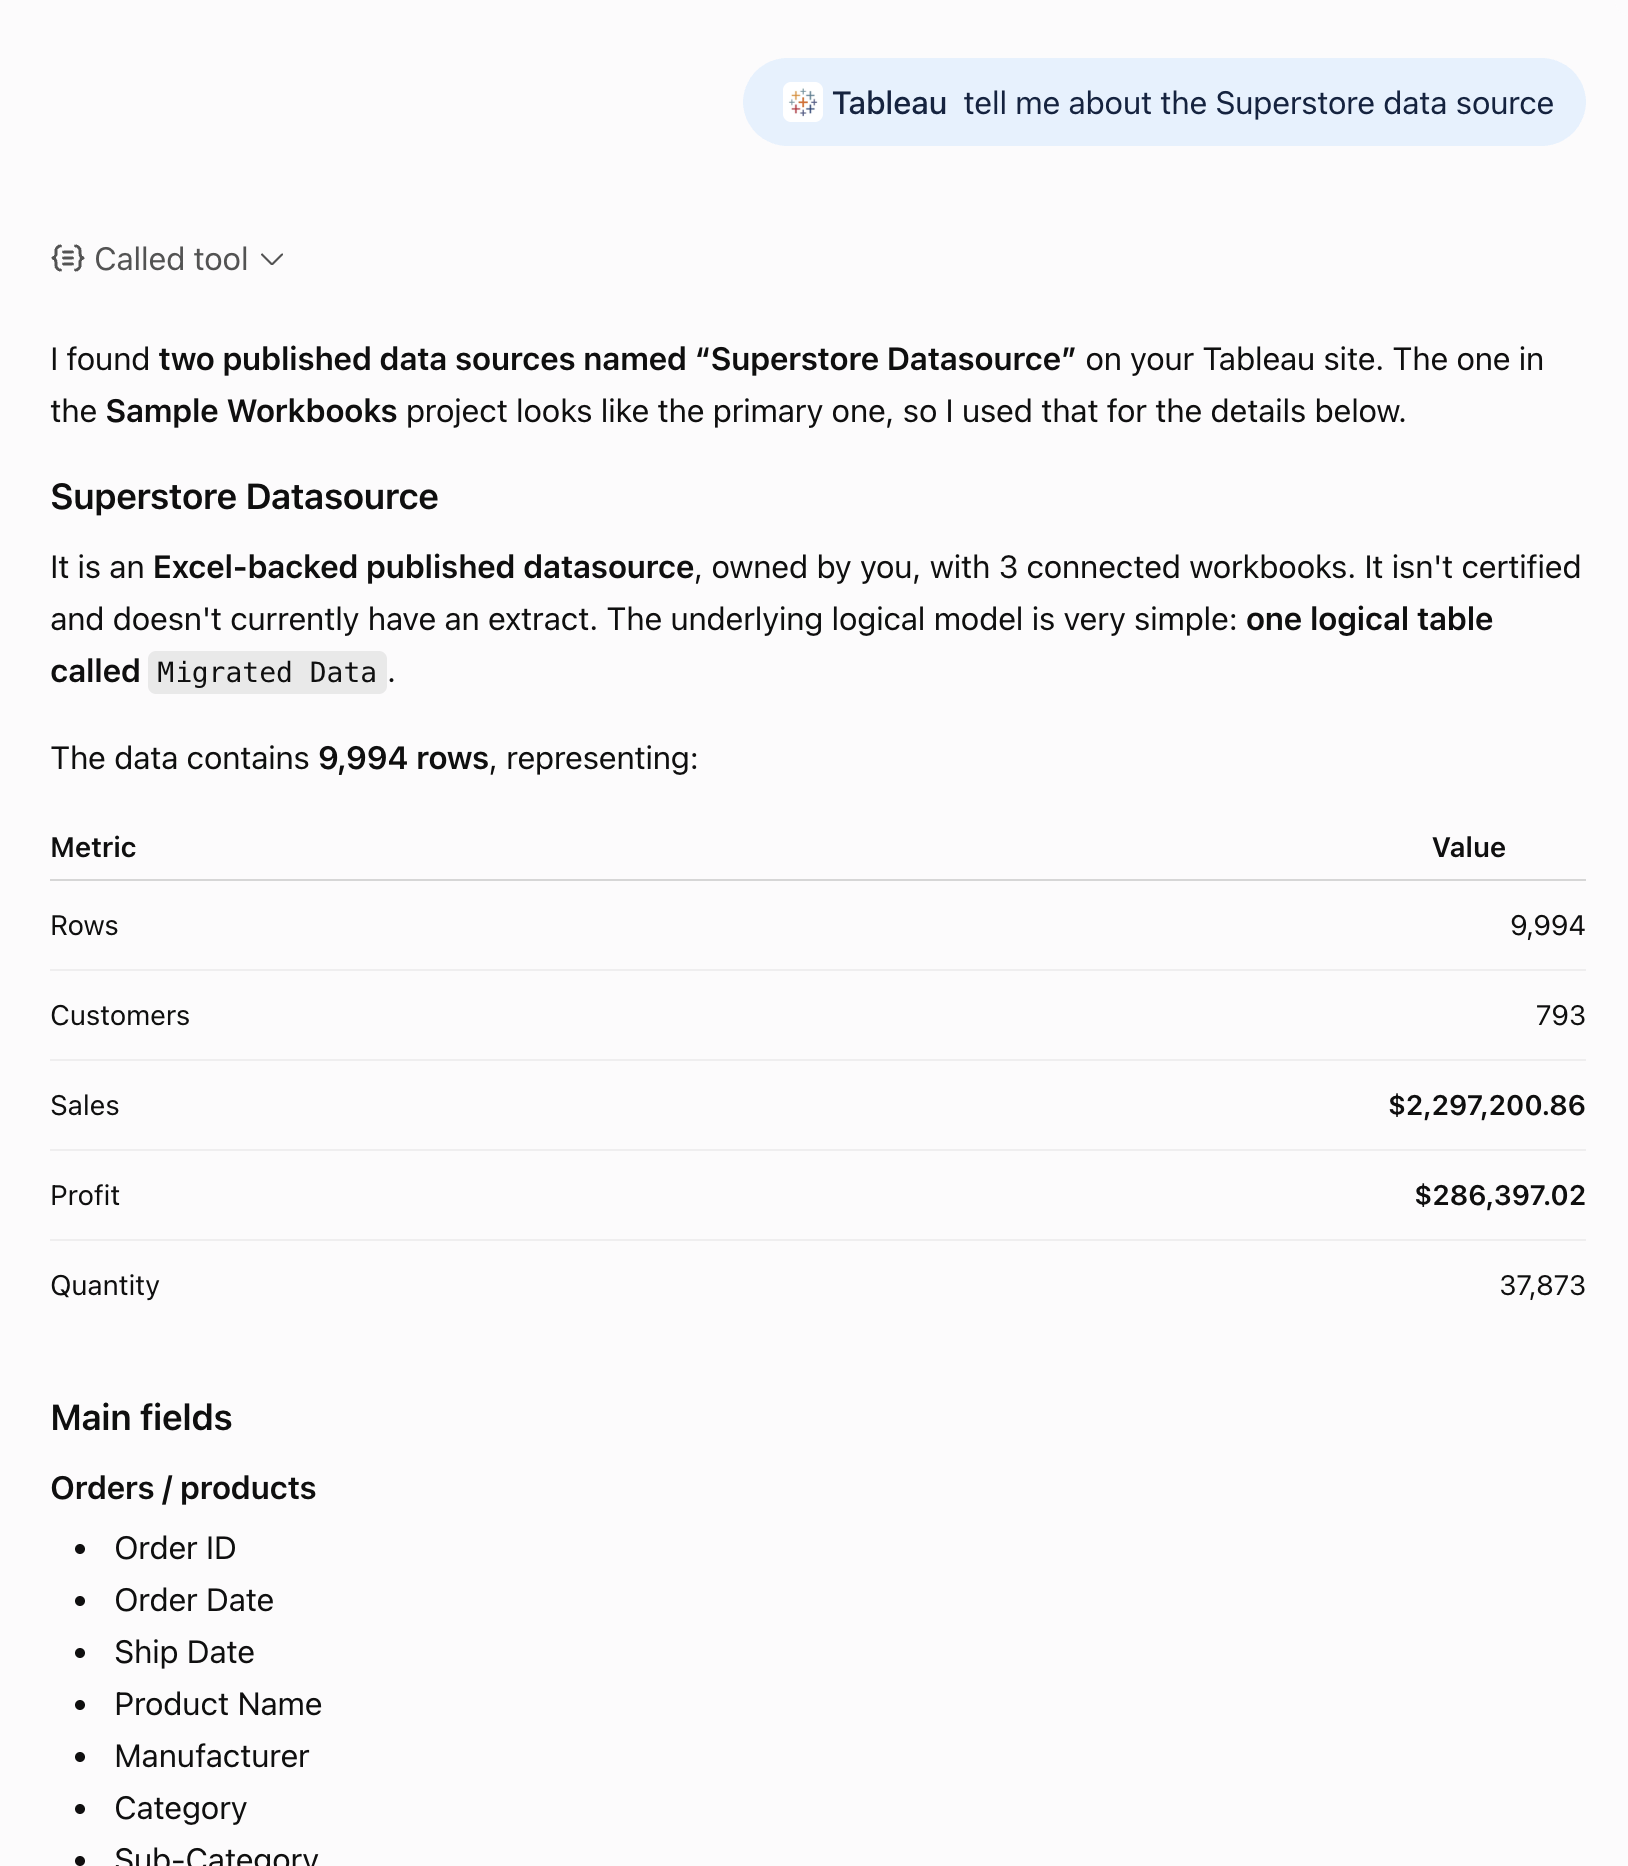
Custom Connector
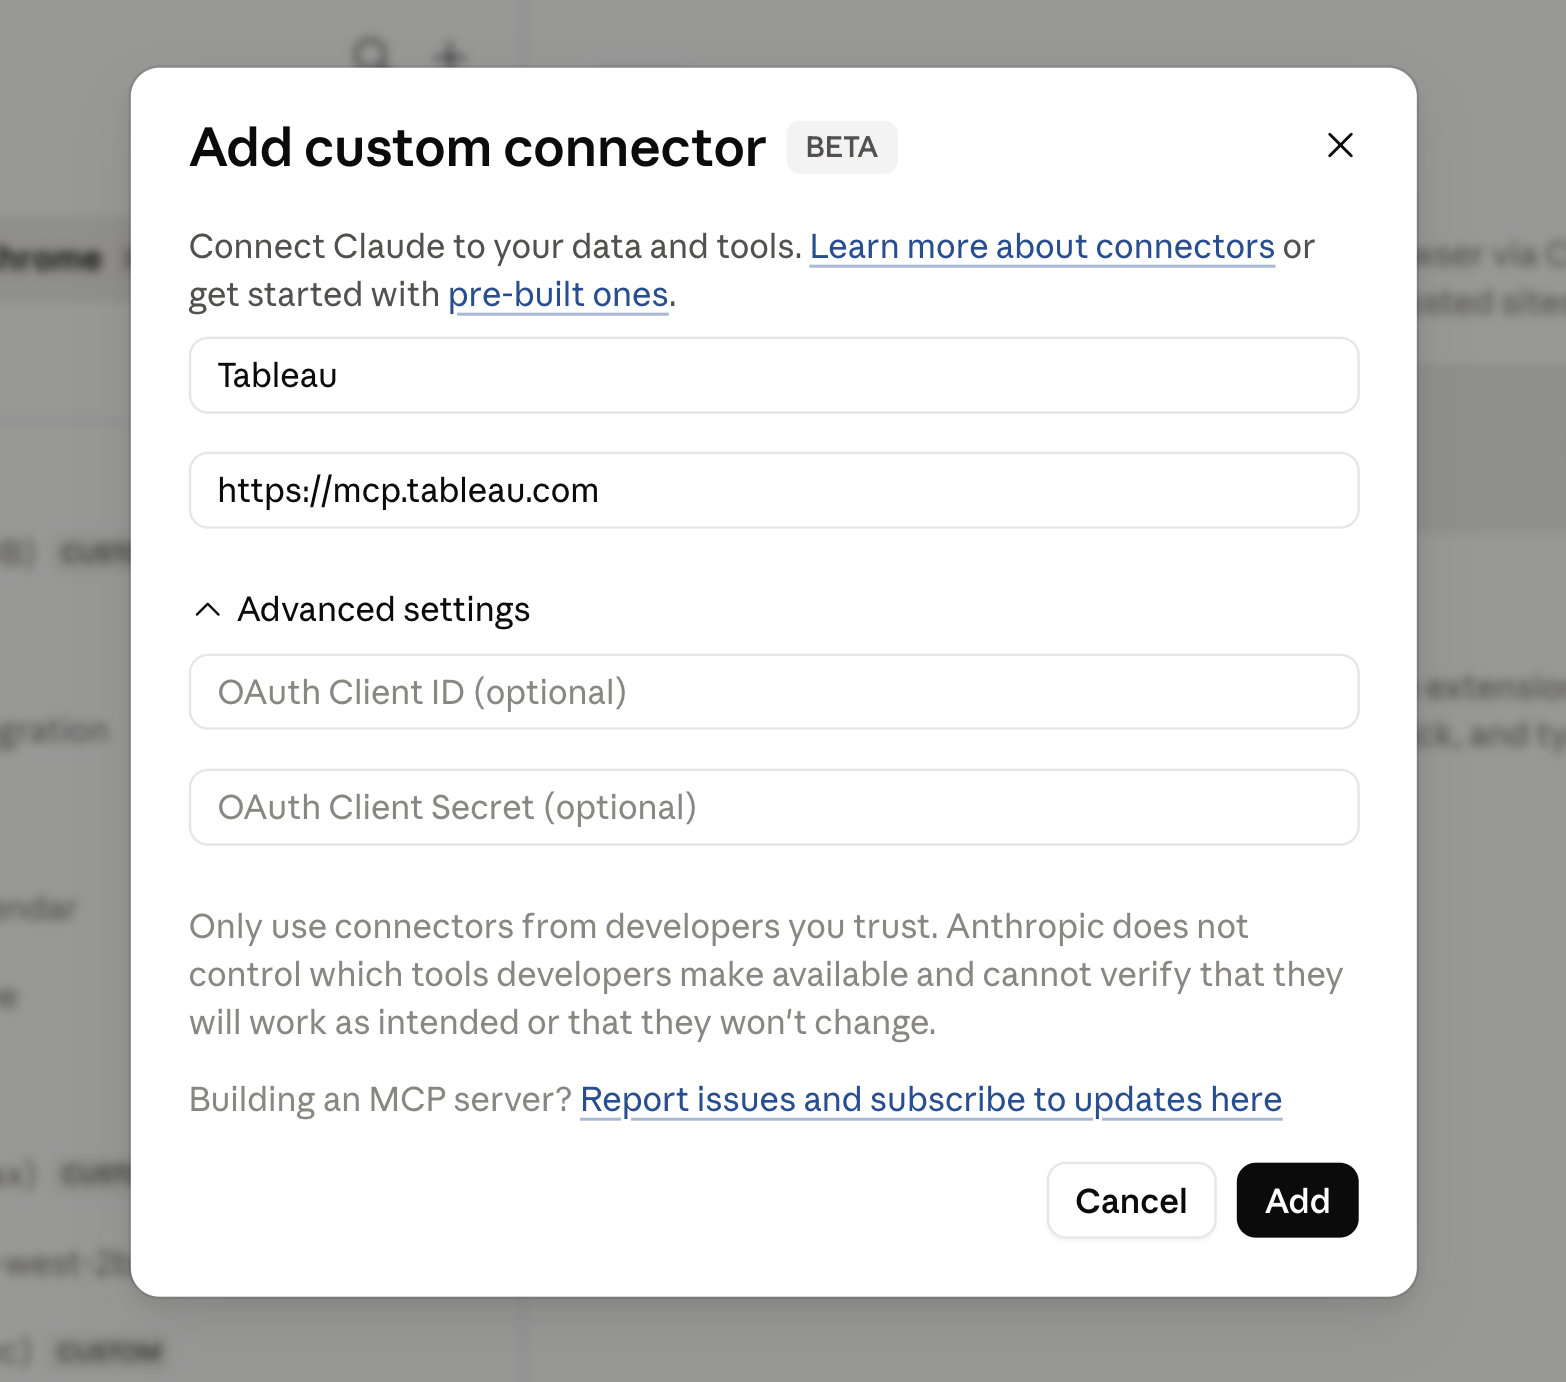
For AI applications and agents not listed here, it's often possible to configure a custom MCP connector. For these, you typically just need to point to the Tableau hosted MCP endpoint https://mcp.tableau.com, then connect to run the auth flow.
Here's an example of adding a custom connector in Claude: